 Param Publication
- Books Name
- CBSE Class 6 Mathematics Book
- Publication
- Param Publication
- Course
- CBSE Class 6
- Subject
- Mathmatics
Perpendiculars
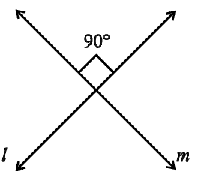
We know that two lines (or rays or segments) are said to be perpendicular if they intersect such that the angles formed between them are right angles.
In the figure, the lines l and m are perpendicular.
Perpendicular to a line through a point on it
Let us do an activity. Given a line l drawn on a paper sheet and a point P lying on the line. It is easy to have a perpendicular to l through P.
We can simply fold the paper such that the lines on both sides of the fold overlap each other.
Tracing paper or any transparent paper could be better for this activity. Let us take such a paper and draw any line l on it. Let us mark a point P anywhere on l.
Fold the sheet such that l is reflected on itself; adjust the fold so that the crease passes through the marked point P. Open out; the crease is perpendicular to l.

Construction perpendicular
Method-1 (Using Ruler and A Set-square)
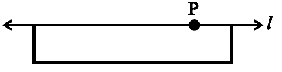
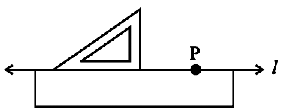
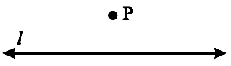
Step 1 A line l and a point P are given. Note that P is on the line l.
![]()
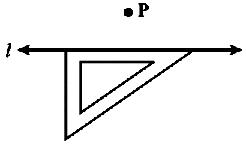
Step 2 Place a ruler with one of its edges along l. Hold this firmly.
Step 3 Place a set-square with one of its edges along the already aligned edge of the ruler such that the right angled corner is in contact with the ruler.
Step 4 Slide the set-square along the edge of ruler until its right angled corner coincides with P.
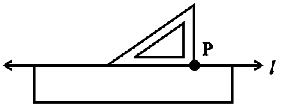
Step 5 Hold the set-square firmly in this position. Draw PQ along the edge of the set-square.
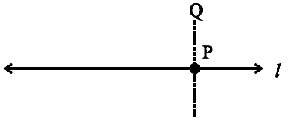
PQ is perpendicular to l.
Method-2 (Using to Ruler and Compasses)
Step 1 Given a point P on a line l.
![]()
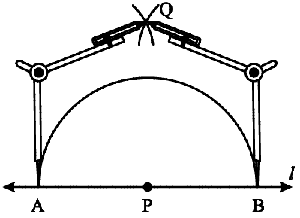
Step 2 With P as centre and a convenient radius, construct an arc intersecting the line l at two points A and B.
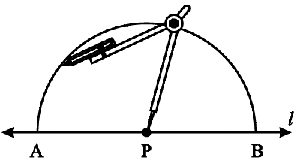
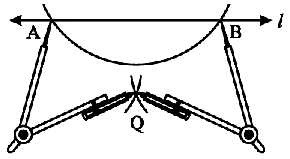
Step 3 With A and B as centres and a radius greater than AP construct two arcs, which cut each other at Q.
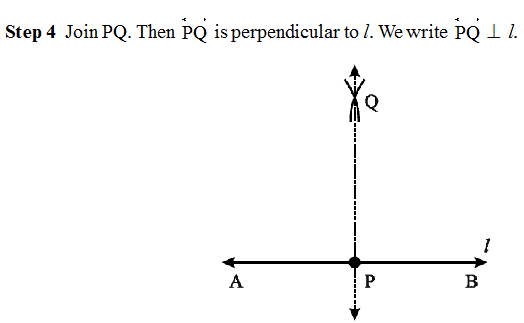
Construction Perpendicular to a line through a point not on it
Method-1 (Using Ruler and A Set-square)
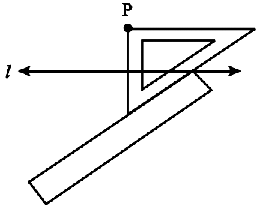
Step 1 Let l be the given line and P be a point outside l.
Step 2 Place a set-square on l such that one arm of its right angle aligns along l.
Step 3 Place a ruler along the edge opposite to the right angle of the set-square.
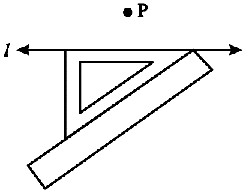
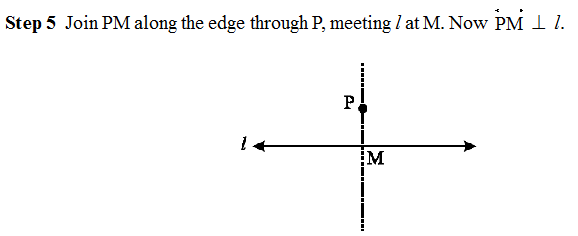
Step 4 Hold the ruler fixed. Slide the set-square along the ruler till the point P touches the other arm of the set-square.
Method-2 (Using Ruler and Compasses)
This is the more convenient and accurate method.
Step 1 Given a line l and a point P not on it.

Step 2 With P as centre, draw an arc which intersects line l at two points A and B.
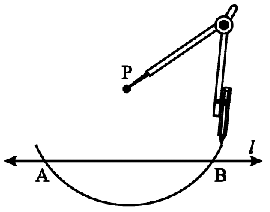
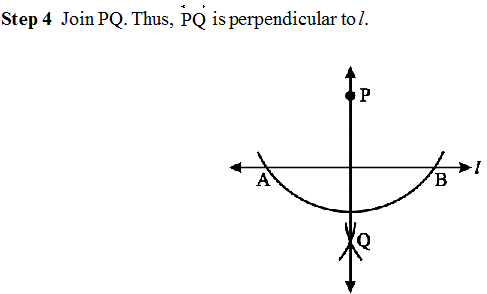
Step 3 Using the same radius and with A and B as centres, construct two arcs that intersect at a point, say Q, on the other side.